Ever wondered how those incredible Roblox experiences and maps come to life? Honestly, it's a journey many aspiring game developers are curious about, and you've found the perfect spot to get started. Learning how to make Roblox maps is a fantastic skill, opening doors to immense creativity and even potential earnings. This comprehensive guide covers everything from downloading Roblox Studio to designing intricate worlds and even publishing your creations for millions to enjoy. We'll explore terrain tools, scripting basics, and essential building techniques, resolving common beginner hurdles. Whether you're a complete novice or looking to refine your skills, this resource provides clear, actionable steps. You'll gain valuable insights into optimization and community engagement, truly helping you stand out. So, let's dive into the fascinating world of Roblox map creation and turn your ideas into playable realities, making sure you understand every aspect thoroughly.
Latest Most Asked Questions about Making Roblox Maps
Welcome to the ultimate living FAQ about making Roblox maps, meticulously updated for the latest patches and features! This is your go-to resource for understanding everything from the absolute basics of Roblox Studio to advanced development techniques. We've combed through countless forum discussions and common queries to bring you the most relevant and helpful answers, ensuring you have all the up-to-date information at your fingertips. Whether you're a complete newcomer or looking to refine specific aspects of your map creation, this guide aims to resolve your biggest questions and help you navigate the Roblox development landscape with confidence. Dive in to get clear, concise, and actionable insights to enhance your building journey.
Beginner Questions about Roblox Studio
How do I start making a map in Roblox?
To begin creating a map in Roblox, you first need to download and install Roblox Studio, which is the official game development platform. Once installed, launch Studio and select a 'Baseplate' template to start with a blank canvas. This provides a clean environment to learn the basic tools for building and scripting your unique world. It’s the essential first step for any aspiring Roblox developer.
What is Roblox Studio and how does it work?
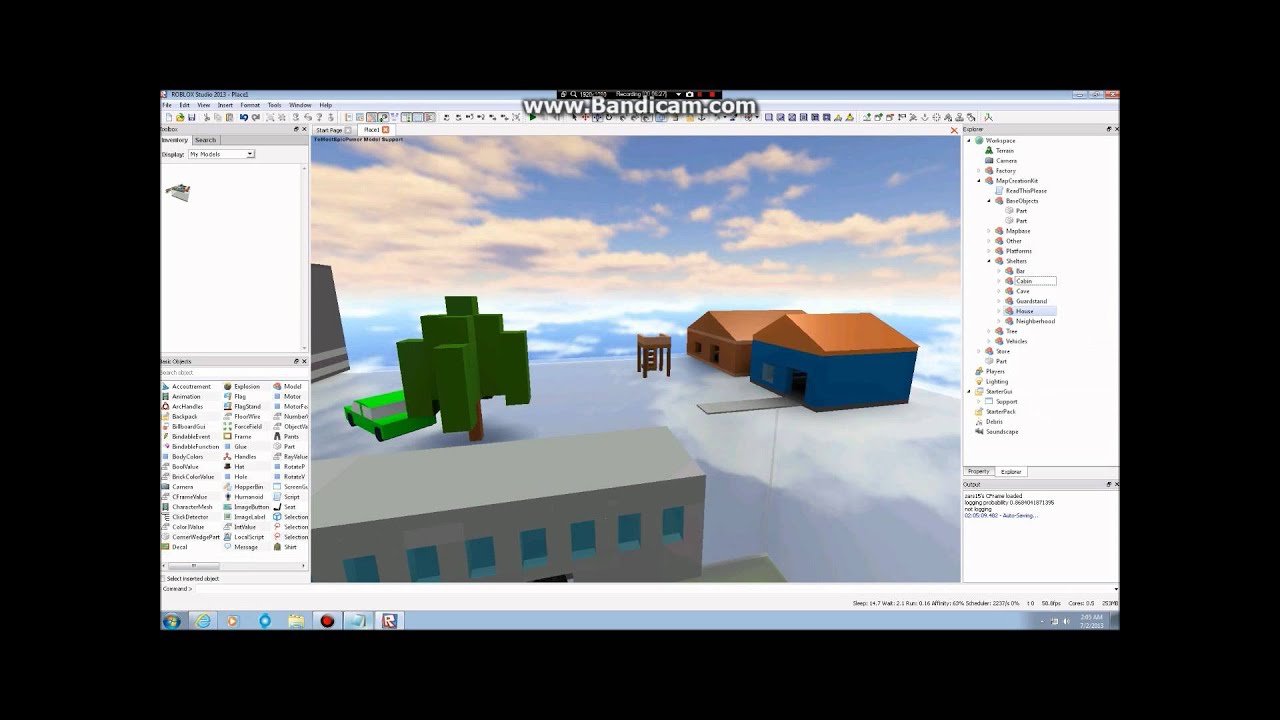
Roblox Studio is a free, integrated development environment (IDE) that allows users to create, design, and publish games and experiences on the Roblox platform. It features a drag-and-drop interface for building, powerful terrain tools, and a built-in code editor for scripting game logic using Lua. It essentially transforms your creative ideas into interactive digital worlds that millions of players can enjoy. Understanding its interface is crucial for efficient development.
Do I need coding experience to make Roblox maps?
No, you don't necessarily need extensive coding experience to start making Roblox maps, especially for basic designs. Roblox Studio offers intuitive building tools and a vast library of free models in the 'Toolbox' that don't require scripting. However, learning some basic Lua scripting will unlock much more interactivity and complex game mechanics, allowing your map to truly come alive. There are plenty of beginner-friendly tutorials available.
Studio Interface & Tools
How do I navigate the Roblox Studio interface efficiently?
Efficient navigation in Roblox Studio relies on understanding key panels like 'Explorer' for object hierarchy and 'Properties' for customization. Utilize the 'Home' tab for core manipulation tools such as 'Move,' 'Scale,' and 'Rotate.' The 'Toolbox' is excellent for quickly adding pre-made assets, saving significant development time. Mastering these panels will streamline your building and design process considerably, allowing you to focus on creativity. Regularly experimenting helps improve muscle memory.
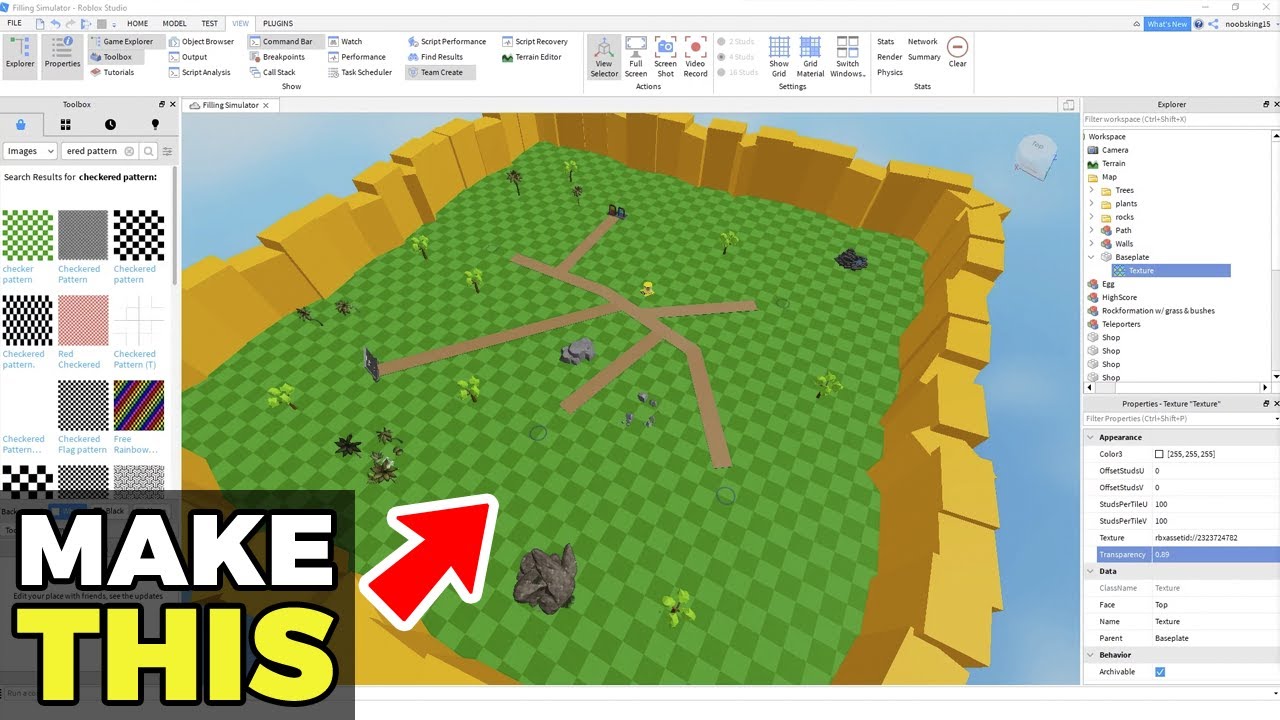
Where are the terrain tools located in Roblox Studio?
The terrain tools in Roblox Studio are found under the 'Home' tab in the ribbon bar. Look for the 'Terrain Editor' button. Clicking this will open a dedicated panel with various brushes like 'Add,' 'Subtract,' 'Smooth,' and 'Flatten,' along with material options like grass and water. These tools allow you to sculpt landscapes, create mountains, and define the natural environment of your map effectively. They are very intuitive to use.
Building & Design Basics
What are the basic building blocks in Roblox Studio?
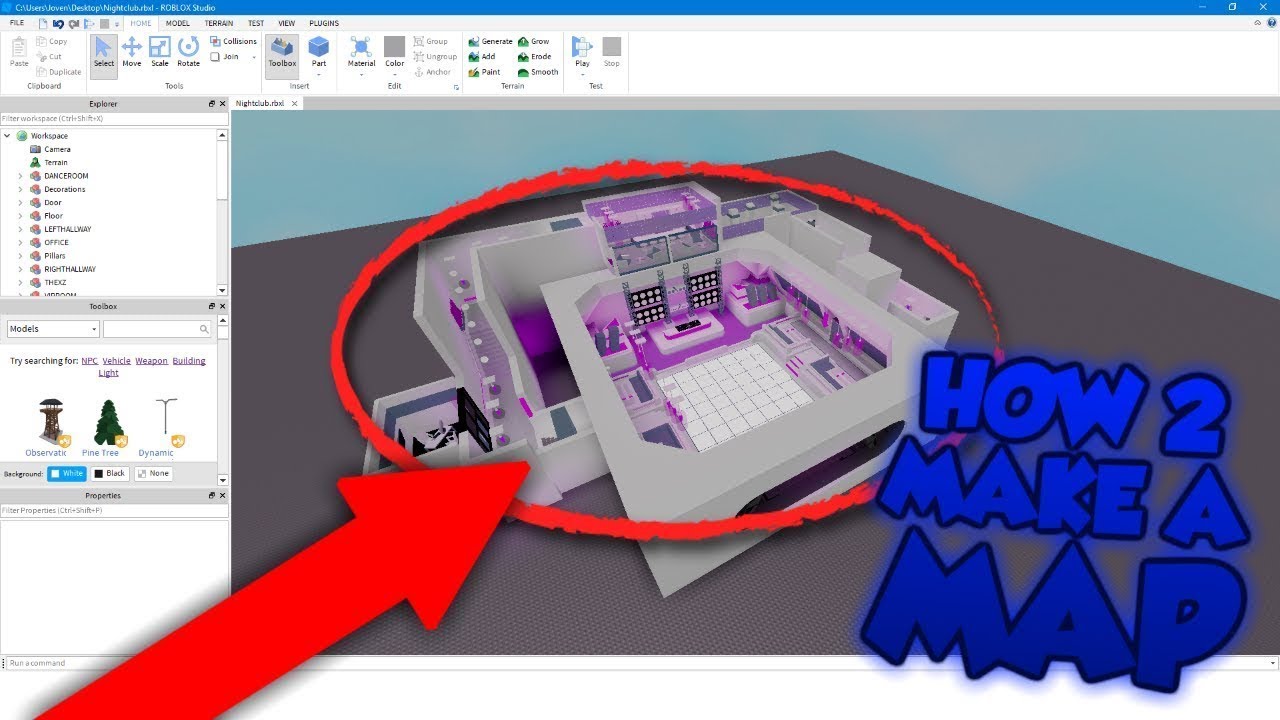
The basic building blocks in Roblox Studio are called 'Parts,' which include fundamental shapes like cubes, spheres, cylinders, and wedges. These parts can be inserted from the 'Model' tab and then manipulated using the 'Move,' 'Scale,' and 'Rotate' tools to construct structures. You can group multiple parts into 'Models' for easier management, forming complex objects and structures within your game world. These are the fundamental elements of almost everything you build.
How do I make custom models for my Roblox map?
To create custom models, you start by assembling individual 'Parts' in Roblox Studio using the basic building tools. Arrange and size these parts to form your desired object. Once satisfied, select all the relevant parts in the 'Explorer' panel, then right-click and choose 'Group' (or use Ctrl+G). This combines them into a single 'Model' that can be easily moved, scaled, and duplicated, making map design more organized. You can even save these to your Toolbox.
Scripting & Game Logic
How can I add interactivity to my Roblox map using scripts?
Adding interactivity to your Roblox map involves writing scripts using the Lua programming language within Roblox Studio. You can insert a 'Script' object into a part or a service like 'ServerScriptService.' These scripts can detect events, like a player touching a part, and then execute specific actions, such as changing a part's color or awarding points. Start with simple event-response scripts to understand the basics of game logic and interaction.
What are some common beginner scripts for Roblox maps?
Common beginner scripts for Roblox maps include making parts change color or disappear on touch, creating simple doors that open and close, or teleporting players between locations. Scripts to award points for specific actions or to trigger basic sound effects are also great starting points. These scripts help new creators understand fundamental programming concepts like events, properties, and basic functions in Lua within Roblox Studio. Many online tutorials explain these in detail.
Monetization & Publishing
How do I publish my Roblox map for others to play?
Publishing your Roblox map is straightforward: go to 'File' and select 'Publish to Roblox.' You'll be prompted to provide a game title, description, and configure visibility settings. Ensure your game has a compelling icon and clear thumbnail to attract players. Once published, your game becomes accessible on your Roblox profile and can be shared with the community. Regular updates and engagement with players help boost its popularity.
Can I earn Robux from my Roblox map, and how?
Yes, you can earn Robux from your Roblox map primarily through 'Developer Products' (consumable items) and 'Game Passes' (permanent perks). These are in-game purchases players can make. Additionally, 'Premium Payouts' allow you to earn Robux based on the engagement of Roblox Premium subscribers in your game. Implementing these monetization strategies involves some scripting and careful game design to offer value to players. It's a great way to be rewarded for your creativity.
Performance & Optimization
How can I improve the performance of my Roblox map?
To improve map performance, focus on reducing the total part count, especially by converting repetitive structures into 'Meshes' or 'Unions.' Optimize scripts to avoid unnecessary loops or calculations, using the 'MicroProfiler' to identify bottlenecks. Efficiently manage textures and materials, and test your game on various devices. Prioritizing performance ensures a smooth experience for all players, which is crucial for retaining an audience. Balancing visual detail with efficiency is key.
Community & Resources
Where can I find help and resources for Roblox map making?
The Roblox developer community is an excellent resource for help. Check out the official Roblox Developer Forum for discussions and tutorials. YouTube hosts countless video guides, and Discord servers dedicated to Roblox development offer real-time support and collaboration opportunities. Don't hesitate to ask questions or share your progress; the community is generally very supportive and knowledgeable. These resources are invaluable for learning and troubleshooting.
Still have questions?
Don't worry, the journey of making Roblox maps is continuous learning! If you're wondering 'How do I add custom textures to my parts?' you're looking to dive into the 'MaterialService' or importing custom images, which opens up more visual possibilities. There are dedicated guides for that specific step! What exactly are you trying to achieve?
So, you’ve been playing Roblox and thinking, “Hey, how exactly do people make these awesome maps?” Honestly, that’s a question many players ponder when they see the sheer variety and creativity within the platform. It's a common curiosity that actually leads many to discover their own passion for game development. And, you know, making your own Roblox maps is not just a cool hobby; it’s a powerful way to express your creativity. It’s totally achievable, and I’m here to walk you through it, covering everything you need to know to get started and beyond.
You might be surprised by how accessible the tools are once you dive in. Roblox has done an incredible job of making its platform user-friendly for creators of all skill levels. I’ve seen firsthand how people with no prior coding experience can go from zero to building amazing worlds. This guide is designed to clarify the process, making sure every step feels manageable and exciting. It’s all about breaking down the big picture into smaller, digestible pieces for you.
Getting Started with Roblox Studio: Your Creative Hub
The first and most crucial step in your map-making adventure is getting familiar with Roblox Studio. This powerful, free software is essentially your workshop for creating any experience on the Roblox platform. Think of it as your digital canvas and toolkit combined. It's where all the magic happens, from laying down basic terrain to scripting complex game mechanics. You truly can't build a map without it, so let's get you set up and comfortable.
Installing Roblox Studio
Downloading Roblox Studio is genuinely straightforward, which is super convenient for new creators. You just head over to the official Roblox website and look for the 'Create' button. Clicking that usually prompts the download, and then it’s a standard installation process. Just follow the on-screen instructions, and you’ll be ready to launch in no time at all. This initial setup is quick and painless, getting you right into the action.
Once installed, open Roblox Studio, and you’ll be greeted by the 'New' screen, offering various templates. I honestly recommend starting with a 'Baseplate' template because it gives you a blank canvas. This provides the most freedom to learn the tools without predefined elements. Exploring these templates can be fun later, but for learning, a blank slate is best. It truly simplifies understanding the core functionalities without distractions.
Understanding the Interface
Navigating Roblox Studio might seem a little daunting at first glance, but honestly, it’s logically laid out. You’ve got several key panels that you’ll be using constantly during your map creation process. Getting to know these panels is like learning the different compartments of a pro artist's toolbox. We'll break down the most important ones so you feel completely at ease.
The 'Explorer' panel, for instance, shows you a hierarchical list of every object in your game. It’s perfect for selecting specific parts, models, or scripts when your map gets complex. The 'Properties' window is right beside it, allowing you to customize selected objects. You can change colors, sizes, materials, and even transparency here. These two panels are your main control center for manipulating game elements effectively and precisely.
Then there's the 'Toolbox,' which is an absolute game-changer for new developers. It's packed with free models, decals, audio, and more, shared by the Roblox community. This means you don’t have to build every single little thing from scratch. The 'Home' tab also has essential tools like 'Move,' 'Scale,' and 'Rotate,' which are crucial for arranging objects. I find myself using these constantly for almost every building task.
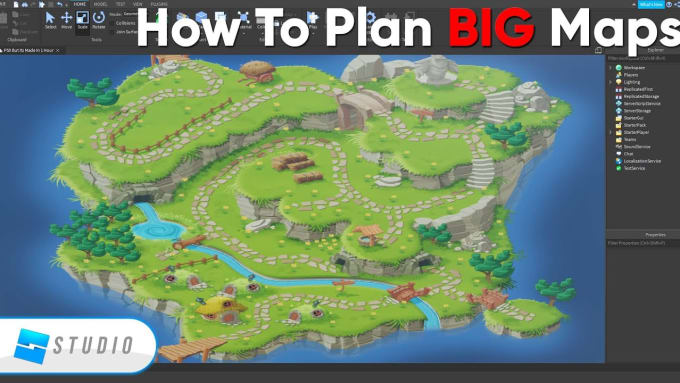
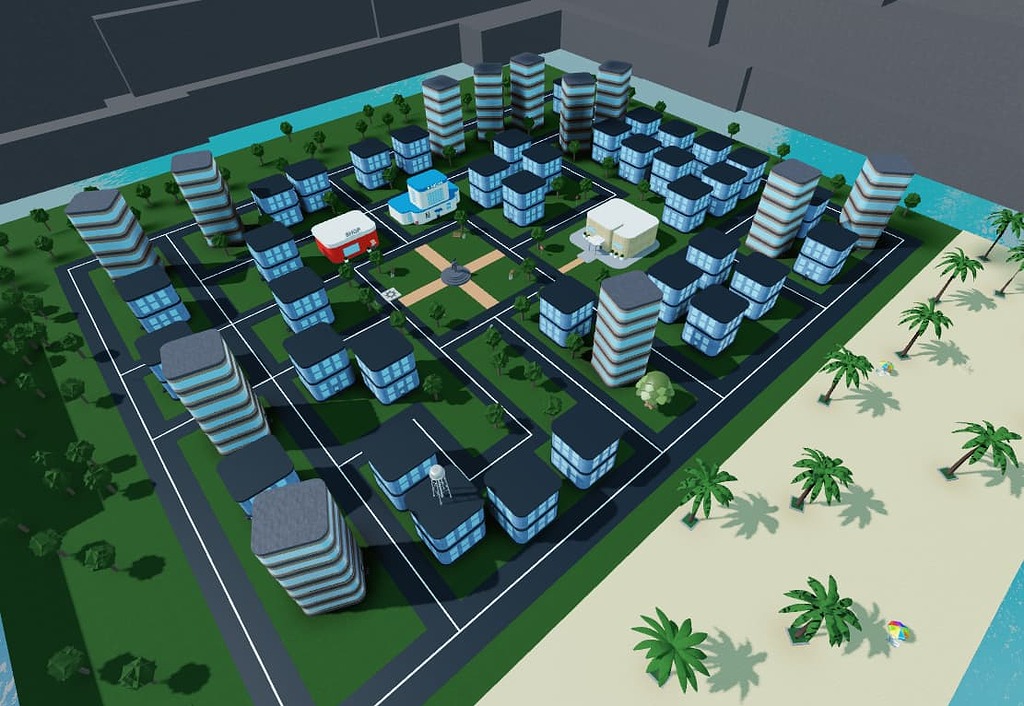
Designing Your First Map: Laying the Foundation
Now that you’re comfortable with the Studio interface, it’s time to start actually building your map. This is where your creative vision really begins to take shape. You're not just placing objects; you're crafting an experience for other players to enjoy. It’s an exciting stage, and there are some fundamental tools you’ll use repeatedly to achieve your design goals effectively.
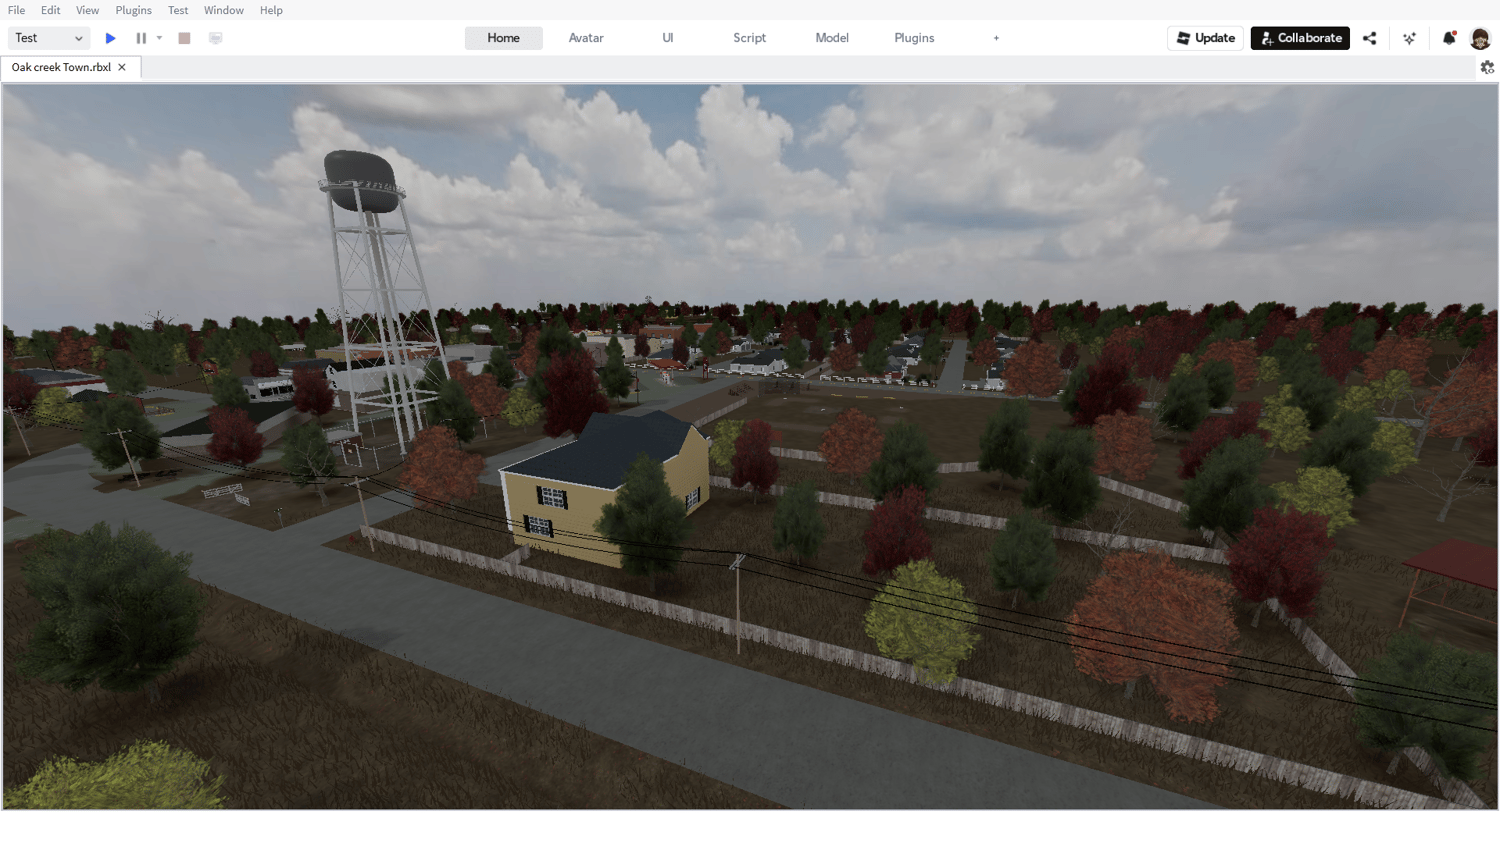
Terrain Tools Explained
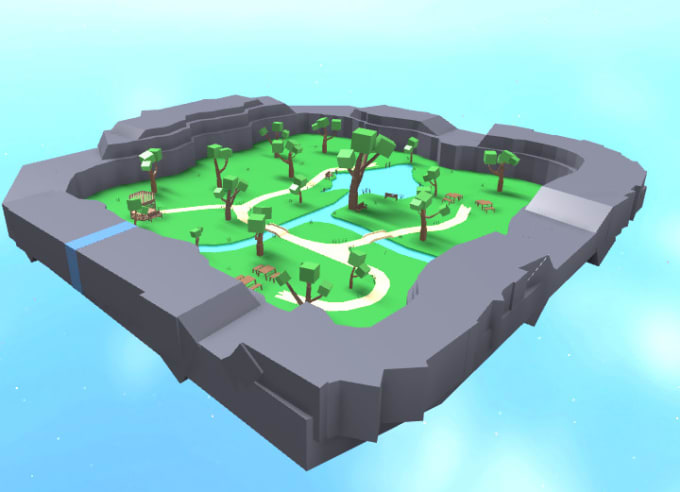
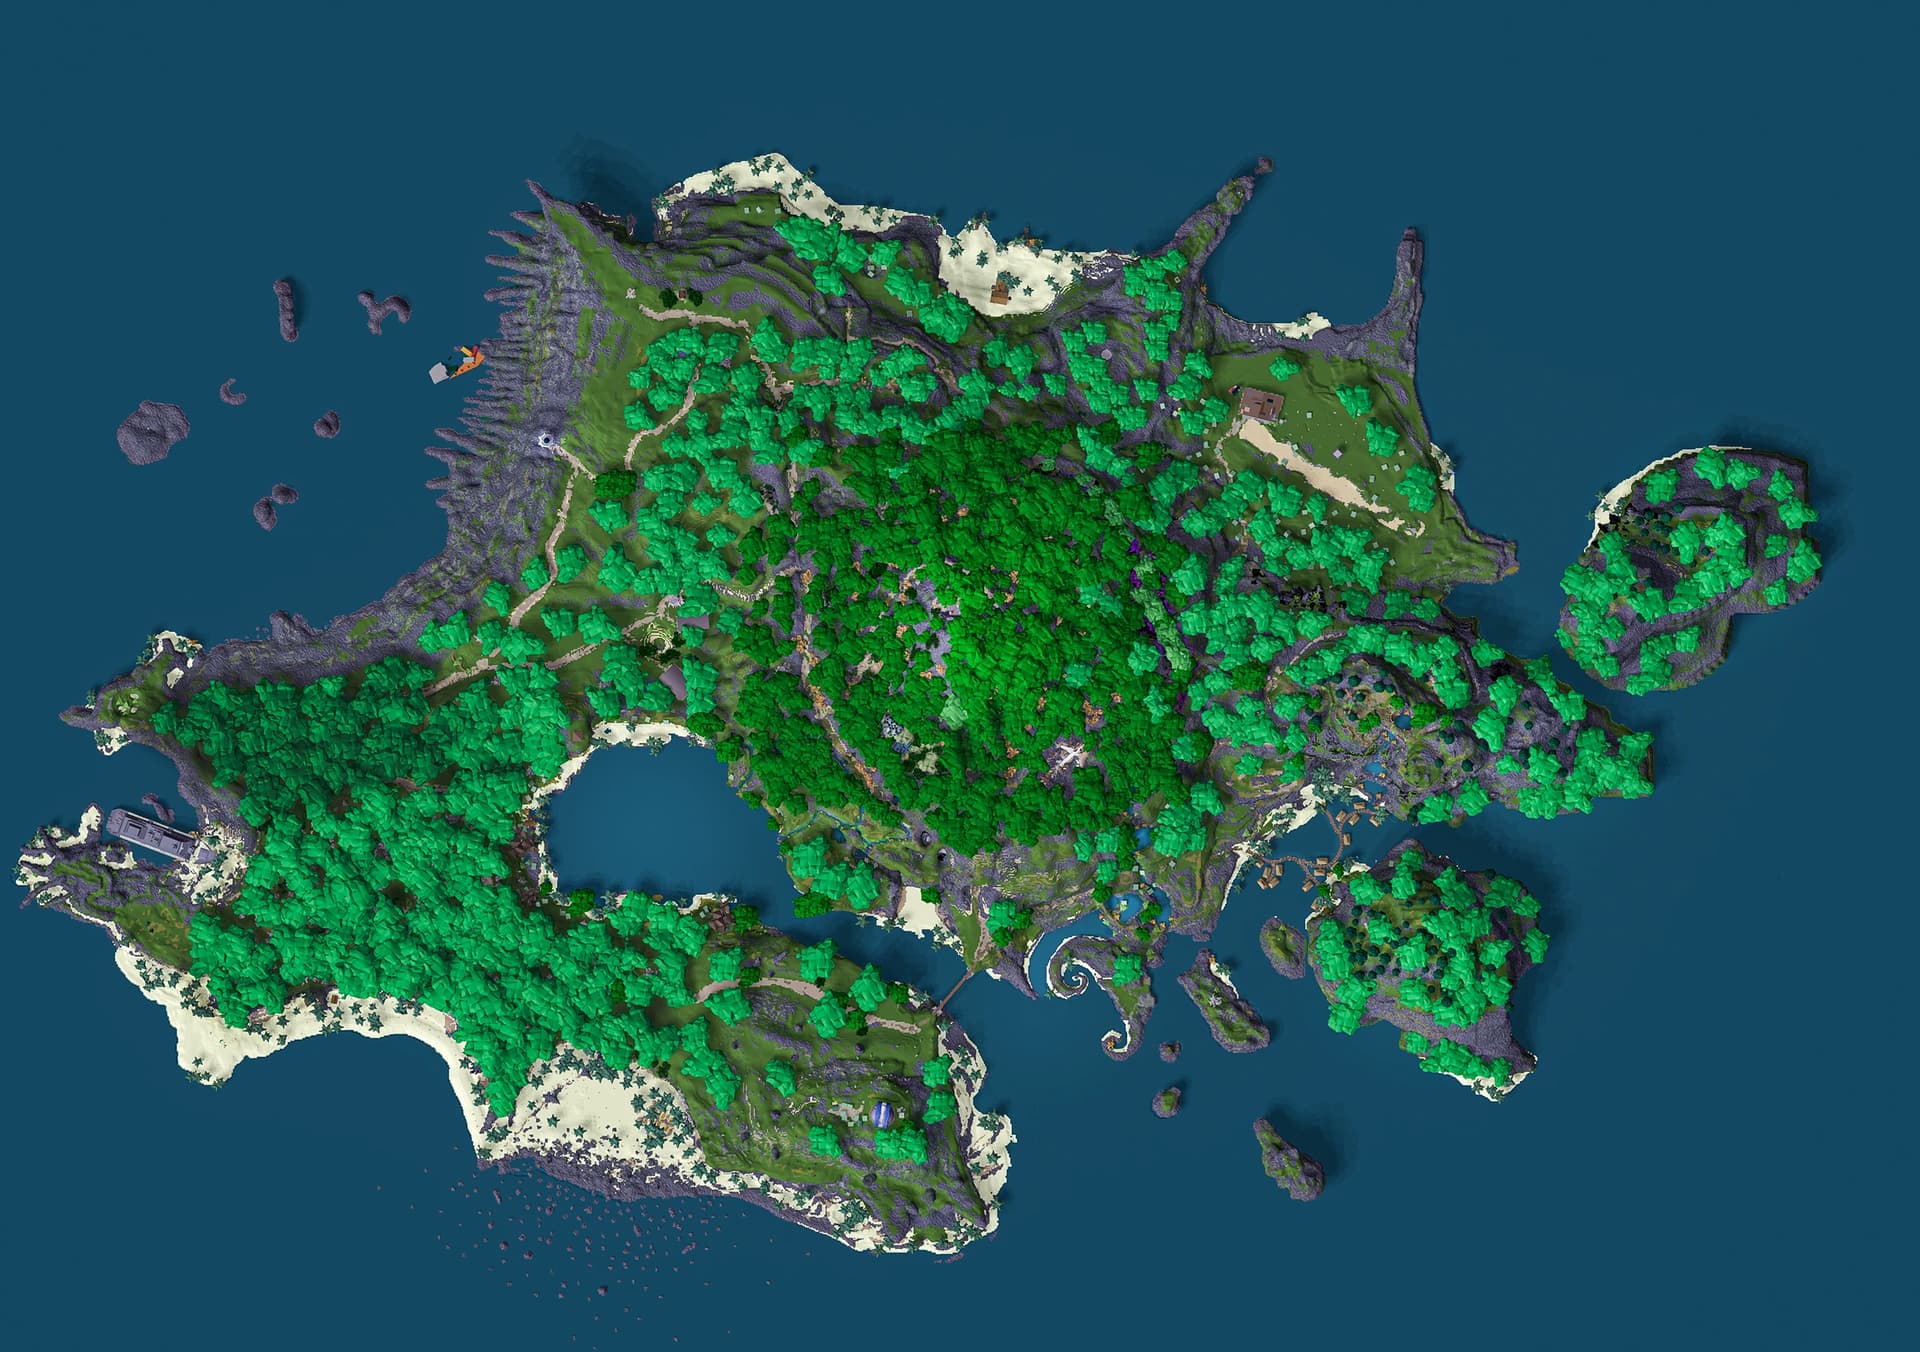
Creating realistic or stylized landscapes is a breeze with Roblox Studio's powerful terrain editor. You'll find the 'Terrain Editor' under the 'Home' tab, and it offers an array of intuitive brushes and settings. This tool lets you sculpt mountains, carve valleys, and even generate entire landscapes with just a few clicks. It’s honestly one of my favorite features because it makes world-building so accessible and fun.
You can 'Add' terrain, 'Subtract' it, 'Smooth' out rough edges, or 'Flatten' areas for building structures. There are different material types like grass, rock, water, and sand to choose from. Experimenting with these brushes is key to understanding their effects on your landscape. Honestly, don't be afraid to just play around; that’s how you truly discover what’s possible. It truly brings your imagined worlds to life beautifully.
Building with Parts and Models
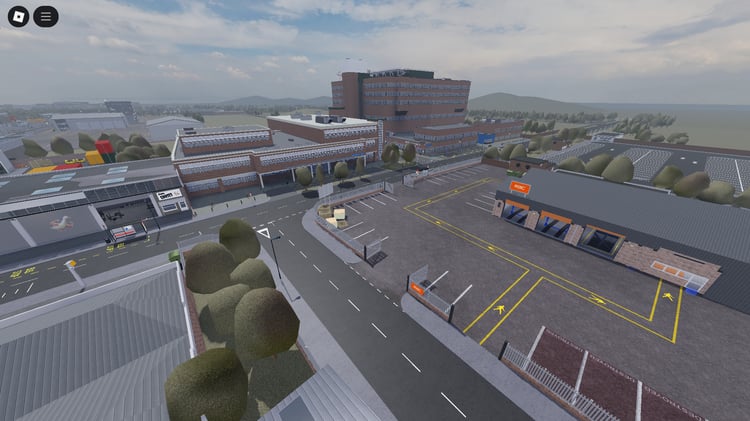
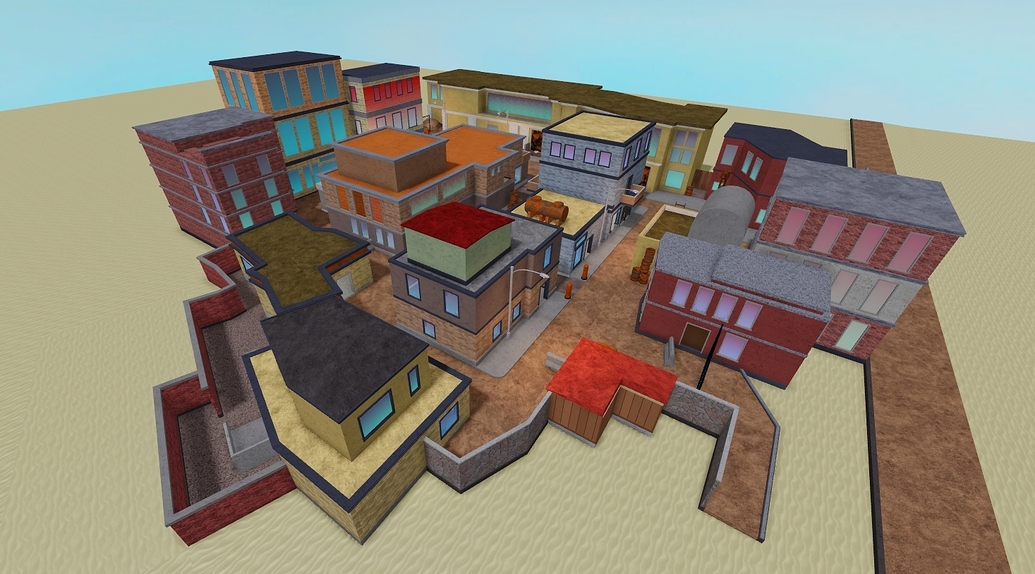
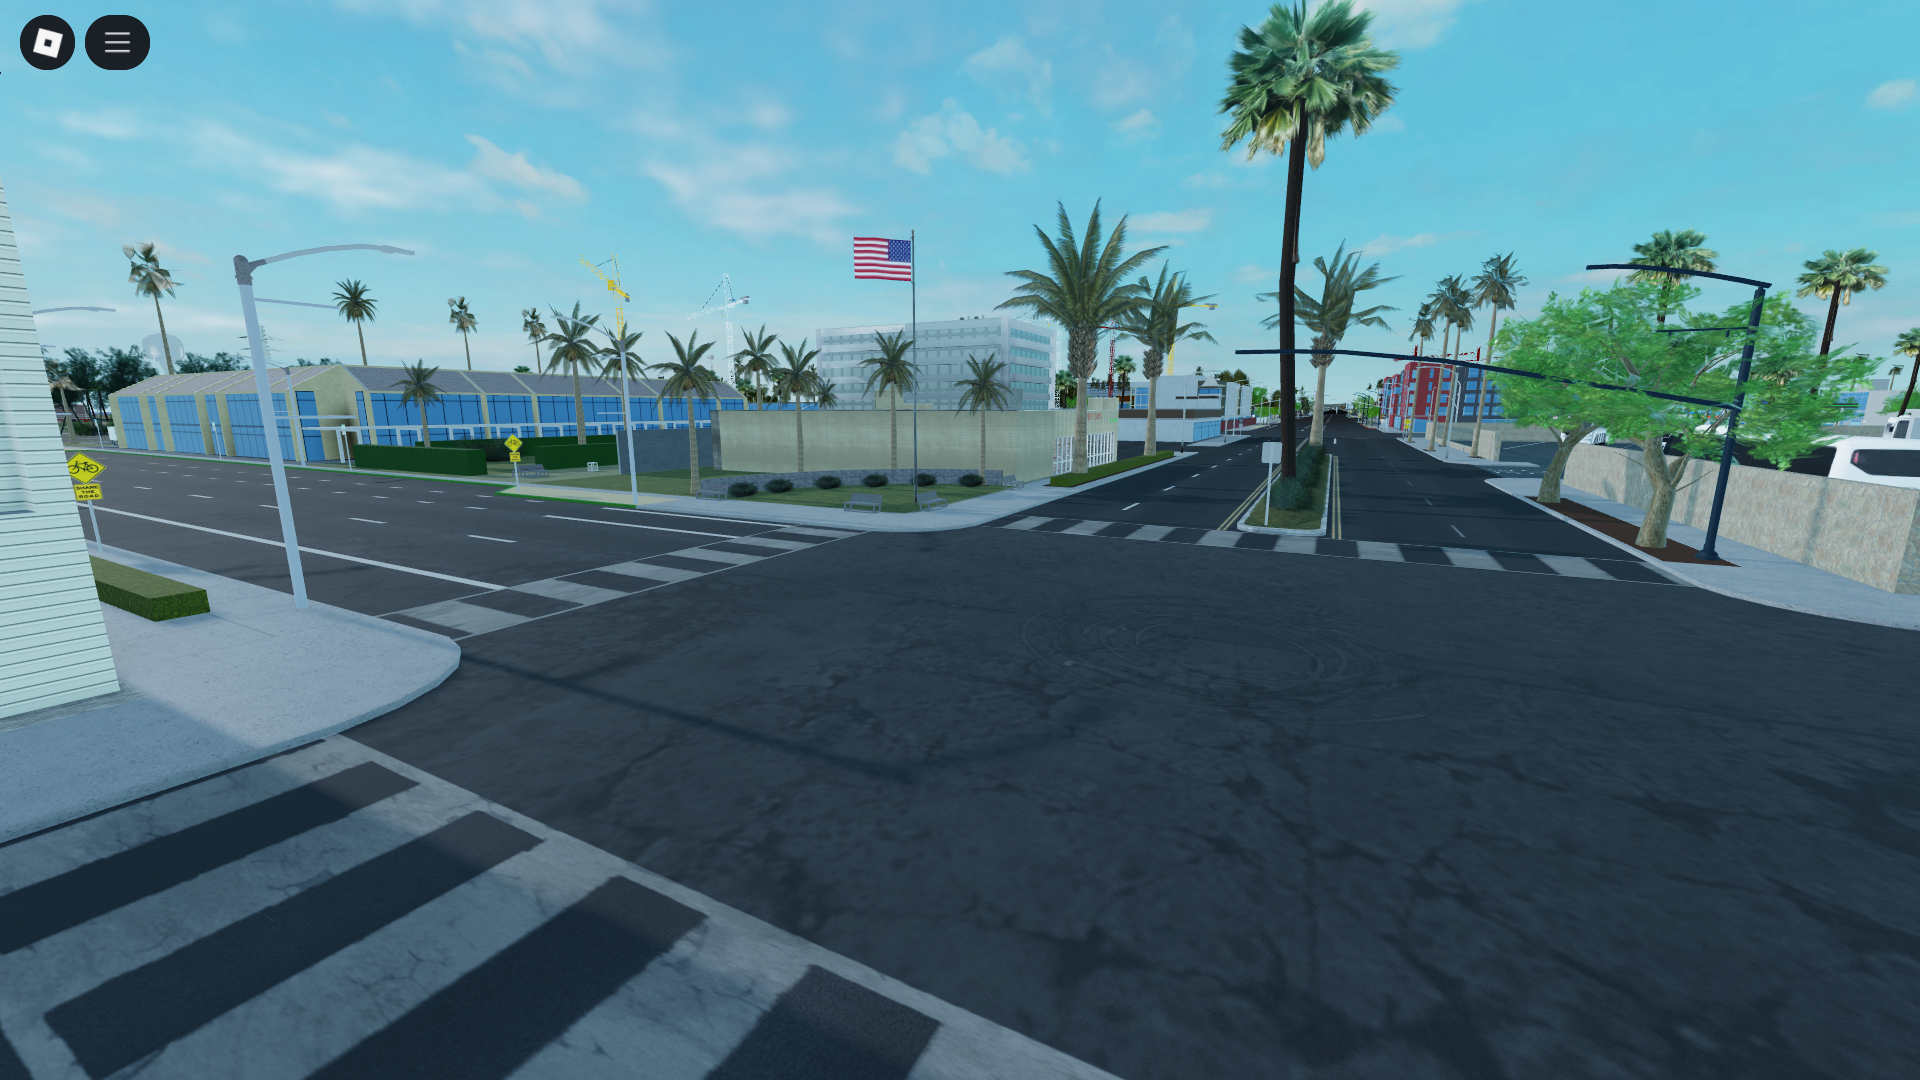
Beyond terrain, the core of any Roblox map relies on 'Parts' and 'Models.' Parts are the basic building blocks: cubes, spheres, cylinders, and wedges. You can insert them from the 'Model' tab and then manipulate them using the 'Move,' 'Scale,' and 'Rotate' tools. It's like building with digital LEGO bricks, offering endless possibilities for structures. You can combine multiple parts to form complex shapes and designs. This fundamental process is incredibly versatile.
Models are essentially groups of parts that function as a single object. You can create your own models by grouping parts together (Ctrl+G or right-click 'Group'). The 'Toolbox' also provides a vast library of pre-made models, which are super helpful for adding details quickly. Just drag and drop them into your workspace to instantly enhance your map. I use the Toolbox constantly for things like trees or furniture. It's a huge time-saver and lets you focus on your unique elements. Remember to always check the integrity and origin of free models for security reasons, though.
Adding Interactivity and Scripts: Bringing Life to Your Map
A static map might look nice, but what truly makes a Roblox experience engaging is interactivity. This means adding elements that players can interact with, like doors that open, buttons that trigger events, or even complex game mechanics. This is where scripting comes into play, using the Lua programming language within Roblox Studio. It’s not as scary as it sounds, I promise.
Basic Scripting Concepts
To start scripting, you’ll insert a 'Script' object into a Part or into the 'ServerScriptService' in the Explorer. When you open a script, you'll see a code editor where you write your Lua code. Don't worry if you've never coded before; Roblox has tons of tutorials and a supportive community. Simple scripts, like making a part change color when touched, are fantastic starting points. It's genuinely a rewarding feeling when your first script actually works!
You'll learn about variables, functions, and events, which are fundamental to any programming language. Understanding how to connect these elements will allow you to create dynamic and responsive maps. For example, a script can detect when a player steps on a certain part and then award them points. This opens up a whole new world of possibilities for your game design. Honestly, the basics are quite intuitive and build upon each other nicely.
Creating Game Mechanics
Once you grasp basic scripting, you can begin implementing more elaborate game mechanics. Think about obstacle courses with moving platforms, interactive puzzles, or even a system for collecting items. These mechanics define how players experience and engage with your map. They turn a pretty environment into a truly playable game. This is where your map transforms from a visual space into an interactive world.
For example, you could script a checkpoint system where players respawn at specific locations after falling. Or you might create a shop where players can spend in-game currency on tools or power-ups. The possibilities are genuinely endless, limited only by your imagination and a bit of learning. Many excellent resources online offer pre-made scripts or tutorials for complex systems. Utilizing these can really accelerate your development process significantly.
Publishing and Monetizing Your Map: Sharing Your Creation
After pouring your heart and soul into building your Roblox map, the next exciting step is sharing it with the world. Publishing your game makes it accessible to millions of players on the Roblox platform. And if your map gains traction, you even have opportunities to earn Robux, turning your creative efforts into something more substantial. It's a truly rewarding feeling to see others enjoy your work.
Getting Your Map Out There
Publishing your game is incredibly simple, which is another great feature of Roblox Studio. You just go to 'File' and select 'Publish to Roblox.' You’ll be prompted to give your game a title, description, and configure a few settings. Make sure your title is catchy and your description clearly explains what players can expect. A good game icon and thumbnail are also crucial for attracting attention. This initial presentation is key for visibility.
Once published, your game will appear on your Roblox profile, and you can share the link with friends. For broader reach, you’ll want to continuously update and improve your game, attracting more players. Player feedback is invaluable for refining your experience and boosting its popularity. Don’t be afraid to ask for constructive criticism; it truly helps your map grow. Actively promoting your game on social media can also make a huge difference.
Making Robux from Your Creation
Roblox offers several ways to monetize your maps, allowing creators to earn Robux from their hard work. The most common methods include creating 'Developer Products' and 'Game Passes.' Developer Products are consumable items like in-game currency or temporary power-ups. Game Passes are one-time purchases that grant permanent perks, such as access to VIP areas or special abilities. These can significantly enhance a player's experience. Setting these up requires a bit of scripting, but it’s definitely worth the effort. Roblox takes a percentage, but you still keep a substantial amount. It's a fantastic way to earn from your passion.
Another avenue is the 'Premium Payouts' program, where you earn Robux based on the engagement of Roblox Premium subscribers in your game. The more Premium players enjoy your map, the more Robux you can earn passively. This encourages creators to build high-quality, engaging experiences that keep players coming back. Diversifying your monetization strategies can really maximize your potential earnings. It’s an evolving ecosystem with great opportunities for dedicated developers.
Advanced Tips and Tricks: Elevating Your Map
Once you’ve mastered the basics, you might be wondering how to make your map truly stand out. There are always ways to refine your creations, improve performance, and leverage the vast Roblox community. These advanced tips can take your map from good to truly great. I've tried many of these myself and seen significant improvements in player experience and engagement. It's all about continuous learning and refinement.
Optimizing Performance
A beautiful map that lags is often a frustrating experience for players, so optimizing performance is crucial. Large numbers of high-detail parts or unoptimized scripts can slow down your game. Regularly check the 'MicroProfiler' in Studio to identify performance bottlenecks. Reducing part count, simplifying complex scripts, and utilizing efficient assets from the Toolbox can make a huge difference. Players will definitely appreciate a smooth, responsive experience. Sometimes, just converting parts into meshes can dramatically improve frame rates. It's a technical but necessary step.
Consider using 'Unions' or 'Meshes' for complex shapes instead of many individual parts. Textures and materials also play a role; high-resolution textures can impact performance on lower-end devices. Striking a balance between visual fidelity and playability is key for a broad audience. Testing your game on different devices, including mobile, is super important. Honestly, a little optimization goes a long way in retaining players.
Leveraging the Creator Community
The Roblox developer community is genuinely one of the most supportive and active out there. There are official Roblox developer forums, countless YouTube tutorials, and Discord servers dedicated to Roblox creation. Don't hesitate to ask questions, share your progress, and seek feedback. You'll find experienced developers willing to offer advice and help resolve tricky issues. I've learned so much from just observing others.
Collaborating with other creators can also be an incredible learning experience and a great way to tackle bigger projects. Many successful Roblox games are the result of team efforts. Sharing your knowledge and helping others will also solidify your understanding. The community is a rich resource for resolving technical challenges and finding inspiration. Honestly, you're never truly alone in your development journey on Roblox. What exactly are you trying to achieve with your next big build?
So, you see, making Roblox maps is a journey, not a destination. It’s about continuous learning, experimentation, and connecting with a vibrant community. Does that make sense? Start small, build consistently, and never stop exploring the endless possibilities within Roblox Studio. Happy creating, and I can't wait to see what amazing worlds you bring to life!
Roblox Studio essentials, terrain sculpting, part building, basic scripting, game logic, publishing, monetization strategies, performance optimization, community resources, common issues resolve.
35


How To Make Maps In Roblox Studio YouTube . Roblox Maps Your Guide To Building Awesome Worlds . How To Create Your Own Map In Roblox Insiderbits Image 2023 10 1024x551 . ROBLOX Studio How To CREATE Amazing MAPS YouTube . How To Make Map In Roblox YouTube

ROBLOX Studio How To CREATE Amazing MAPS Pt 2 YouTube . How To Create A Mini Map In Roblox Studio Tutorial YouTube . How To Make A Map Generator In Roblox Studio YouTube . Roblox Maps Your Guide To Building Awesome Worlds . How To Make A Map In Roblox A Simple Guide Playbite How To Make A Map Roblox 1024x576


Create Awesome Roblox Maps Create Roblox Map And Realistic Models With Blender Or Roblox Studio . Ruski S Tutorial 1 How To Design A Map Layout Community Tutorials . Roblox Maps Your Guide To Building Awesome Worlds Build A Realistic Roblox Map . Shock Discovery How To Make A Uv Map Car In Roblox Studio And It Sparks Shock Discovery How To Make A Uv Map Car In Roblox Studio And It Sparks Outrage . How To Make A Simulator Game On Roblox Part 2 Map YouTube


How To Make A Map In Roblox Studio Step By Step Tutorial O . Roblox Maps Your Guide To Building Awesome Worlds Make Roblox Map Roblox Map Builder Roblox Builder Realistic Roblox Map . How To Make A Mini Map Inside Roblox Studio 2022 YouTube . Free Maps Roblox . Roblox Maps Your Guide To Building Awesome Worlds Make A Roblox Map For Your Game


Roblox Maps Your Guide To Building Awesome Worlds Create 3d Maps And Model For Your Roblox Game . Ruski S Tutorial 1 How To Design A Map Layout Community Tutorials 2 1035x574 . Roblox Maps Your Guide To Building Awesome Worlds Make You A Roblox Build . How To Build An Immersive Environment In Roblox Studio Payhip O . Need Some Map Advice Building Support Developer Forum Roblox


How To Make Robux With Your Roblox Game In 2025 Passes Dev Products O . How To Make A Map In Roblox Studio Step By Step Tutorial O . Ep 1 Roblox Studio Beginner Tutorial How To Build A Map YouTube . Roblox 2026 Logo REVEALED New Color New Look YouTube Maxres2 . Create Awesome Roblox Maps How To Make A Map In Roblox 1


How To Make A High Quality No Distorsion Image Of The Map Art . How To Add People Roblox Easily Your 2026 Guide . City Map For My Game Creations Feedback Developer Forum Roblox 2 1024x706 . Build A Map For Your Roblox Game By Velocin 7 Fiverr Build A Map For Your Roblox Game 4989 . Roblox Maps Your Guide To Building Awesome Worlds 2 690x360