Delve into the vibrant world of Roblox character animation a crucial skill for any aspiring game developer or content creator. This guide provides comprehensive navigational and informational insights into bringing your Roblox avatars to life. Discover trending techniques from using the built-in Animation Editor to advanced scripting for dynamic movements. We explore why mastering animation is key for immersive gameplay enhancing user experience across countless Roblox experiences. Learn how to craft custom emotes realistic walk cycles and expressive character actions that captivate your audience. Whether you are a beginner seeking fundamental steps or an experienced developer refining your craft this resource offers invaluable tips and tricks. Stay ahead of the curve with the latest animation tools and community best practices ensuring your creations stand out in the bustling Roblox metaverse. Understand the nuances of R15 versus R6 animation models and unlock the full potential of your character designs today.
Hey there, ever wondered how those Roblox characters you see running, jumping, and dancing in games get all their awesome moves? Well, animating Roblox characters is essentially like being a puppeteer, but instead of strings, you're using a special tool called the Animation Editor in Roblox Studio. It's about bringing your virtual creations to life, giving them personality, and making them interact with the game world in a believable way. You're basically designing how their arms swing when they walk, how they react when they jump, or even a super cool custom dance!
It's not just for big game developers; anyone can learn to do it! You'll pick a character model, set up key poses on a timeline, and then let the software smoothly transition between them. Think of it as creating a flipbook animation, but way more high-tech. Whether you want to make a simple wave or an intricate combat sequence, understanding animation is what makes your Roblox experiences truly pop and feel more immersive. It’s a creative skill that really lets your unique vision shine through in the Roblox universe!
And why does it matter? Because fantastic animations make games feel alive and engaging! When characters move naturally, it pulls players deeper into the experience. Plus, with ongoing updates, the tools are always getting better, making it easier than ever to add professional polish. So, diving into animating is a fantastic way to elevate your game development and stand out from the crowd.
Welcome to the ultimate living FAQ about animating Roblox characters, meticulously updated for the latest patches and features in 2024! If you've ever found yourself scratching your head trying to make your Roblox avatar do more than just stand there, you're in excellent company. This comprehensive guide is designed to clarify all your animation queries, from fundamental concepts to advanced techniques, ensuring your characters move with the flair and realism they deserve. We've scoured forums and community discussions to bring you the most asked questions, coupled with expert answers, tips, and tricks to elevate your game development skills. Let's get those characters moving!
Beginner Questions about Roblox Animation
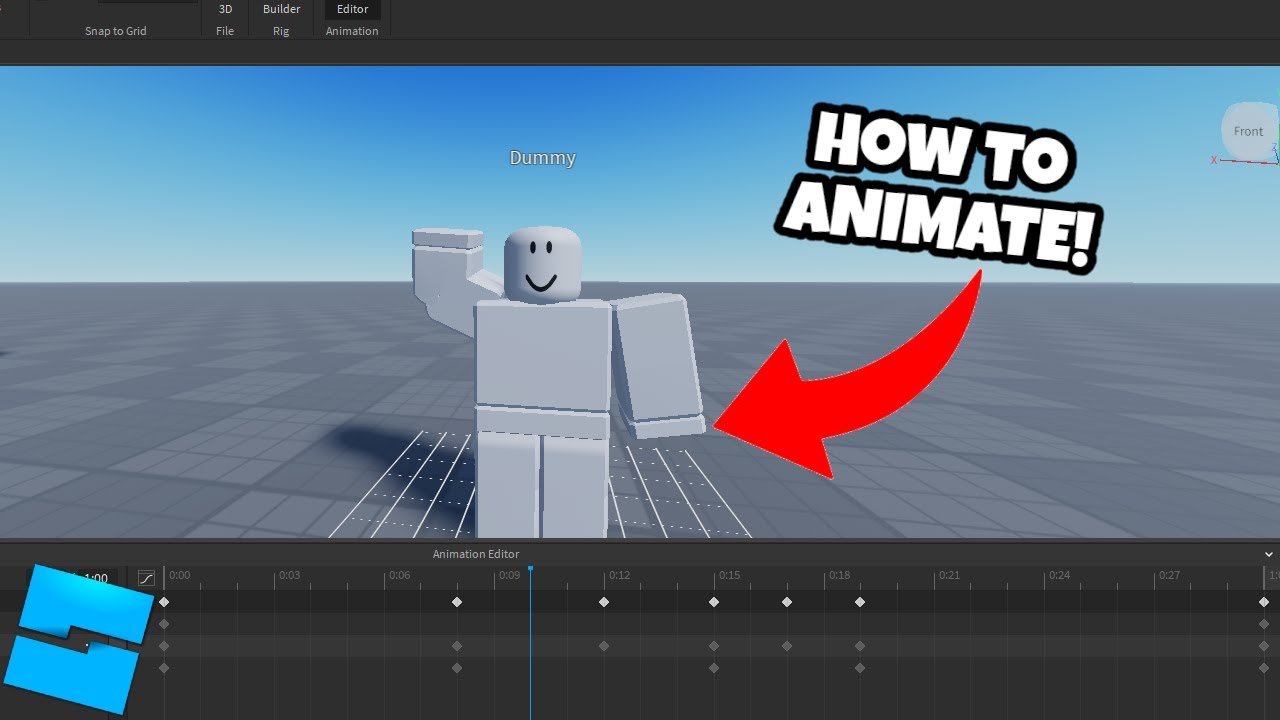
How do I open the Animation Editor in Roblox Studio?
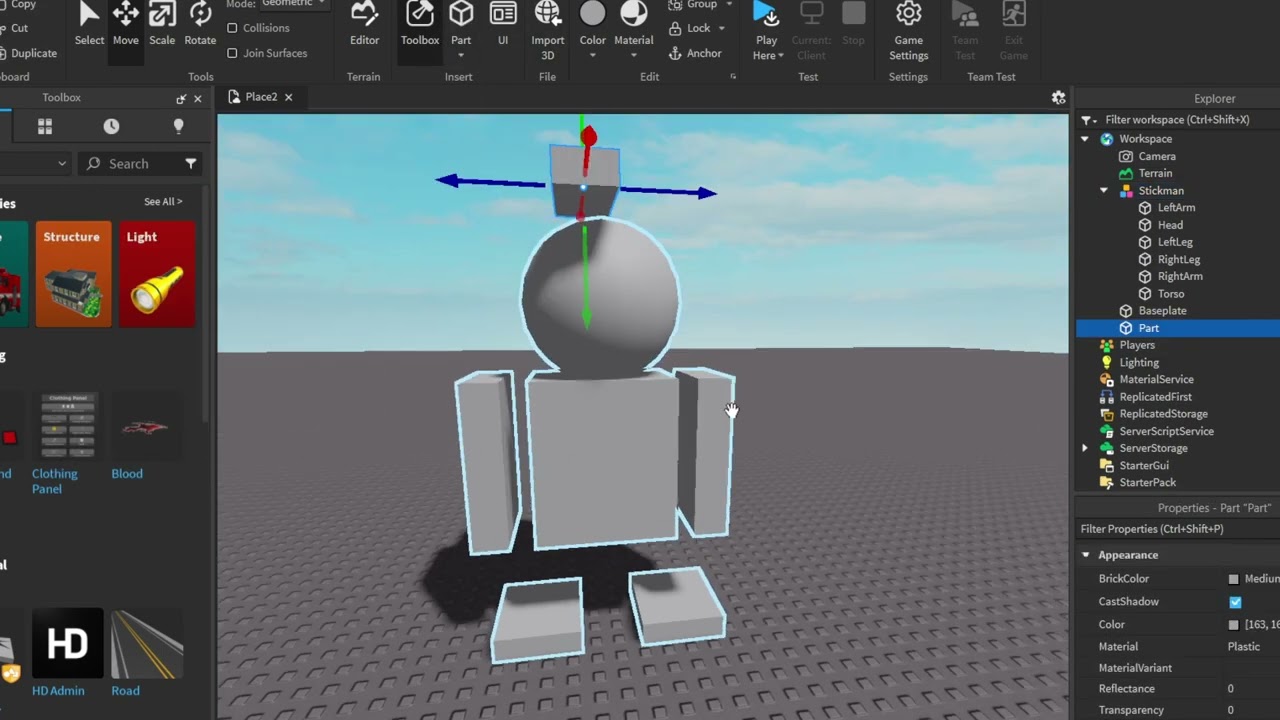
The Animation Editor is accessed via the Plugins tab in Roblox Studio. After inserting a Rig into your workspace, navigate to the 'Plugins' menu at the top of Studio and click on the 'Animation Editor' icon. This will launch the dedicated interface for creating and managing character animations.
What is the difference between an R6 and R15 rig for animation?
R6 rigs have 6 body parts, offering simpler, blockier movements, ideal for classic Roblox aesthetics. R15 rigs, with 15 body parts, allow for much more detailed and fluid animations due to their increased articulation. Choose R15 for modern, expressive character movements and R6 for retro or very stylized games.
Can I use pre-made animations from Roblox?
Yes, Roblox offers a library of pre-made animations that you can incorporate into your games. These can be found on the Roblox Marketplace or through various animation packs. Developers can also import and modify these animations using the Animation Editor, saving significant development time.
Getting Started with the Animation Editor
What are the basic steps to create a simple animation?
To create a simple animation, first open the Animation Editor and select your character rig. Click 'Create' to start a new animation and name it. Move your character's joints to a desired pose, then click 'Add Keyframe'. Repeat this process at different points on the timeline to define your character's movement. Play it back to refine.
R15 vs R6 Animation Differences
Why should I animate with an R15 character instead of R6?
You should animate with an R15 character for more expressive and natural movements. R15 models have more joints (15 vs 6), allowing for greater articulation in limbs and torso, which leads to smoother, more realistic animations. This is ideal for modern games aiming for higher fidelity character interactions.
Common Animation Bugs & Fixes
My animation isn't playing in my game, what could be wrong?
If your animation isn't playing, first verify your AnimationId is correct and published to Roblox. Ensure the 'Animation' object has its 'AnimationId' property properly set. Check that an 'Animator' component exists on your character. Use Studio's output window for script errors and confirm the animation is loaded and played correctly via a script.
Tips & Tricks for Smooth Animations
What are some common tricks for making animations look less stiff?
To make animations less stiff, focus on using
Have you ever wondered how those amazing Roblox characters move with such fluid grace, bringing games to life? It's all about animation, and you're in the right place to unlock those secrets. Many people ask, 'How exactly do I animate my own Roblox characters to make my games truly stand out?' Well, don't worry, because we're diving deep into the fascinating world of bringing your Roblox creations to vivid, dynamic motion in 2024. It's an essential skill for anyone looking to build captivating experiences.
So, you're ready to make your characters dance, fight, or just walk naturally. Finding the best Roblox Avatar Animation Tutorials is your first real step into this creative journey. These guides often break down complex processes into digestible parts, showing you precisely how to manipulate character joints and create keyframes for seamless movement. It's really about building a foundational understanding before you leap into more intricate designs.
A crucial decision you'll face early on is whether to animate for Roblox R15 vs R6 Animation. Why does this matter? R15 characters offer far more articulation points, allowing for incredibly fluid and realistic movements, which is a big win for modern game design. R6, while simpler, limits your creative scope significantly, making R15 the go-to for most current projects needing expressive characters. Understanding these differences empowers you to pick the right base for your project's visual style and complexity.
When you first open Roblox Studio, the Roblox Animation Editor Basics might seem a little daunting, but trust me, it's super intuitive once you get the hang of it. This powerful built-in tool is where all the magic happens, letting you pose your character frame by frame. Learning its interface and core functionalities is non-negotiable for anyone serious about animation, as it's the primary environment for bringing your ideas to life. It truly puts the power of dynamic movement directly into your hands.
Going beyond the default animations opens up a world of possibilities for Custom Roblox Character Movement. You can design unique idles, elaborate attack sequences, or even quirky dances that define your game's personality. This is where your creative vision truly shines, allowing you to give your characters distinct behaviors and make your game unforgettable. Mastering custom movements transforms generic avatars into memorable, interactive personalities that players will love.
Beginner / Core Concepts
1. Q: How do I even start animating a Roblox character in Studio?
A: I get why this confuses so many people when they first open Roblox Studio! It can feel like a big blank canvas, but starting is simpler than you think. First, you'll want to insert a Rig into your workspace. You can choose between an R6 or R15 character model, which are essentially your blank canvases for movement. Once your rig is in place, navigate to the Plugins tab in Roblox Studio and click on the Animation Editor. This opens up the dedicated animation workspace. Don't worry if it looks a bit complex initially, we're just getting set up. Your first step inside the editor will be to select your character rig, then click Create to start a new animation. Give it a descriptive name like "Idle" or "Walk." From there, you'll see a timeline and a viewport where you can manipulate your character's joints. The key is to select different body parts, rotate them using the Rotate tool, and then click the Add Keyframe button on the timeline. Repeat this for different poses across your timeline to create motion. Remember, animation is just a series of still images played in quick succession, so think about breaking down a movement into its key poses. You've got this! Try starting with a simple wave or a head turn to get comfortable.
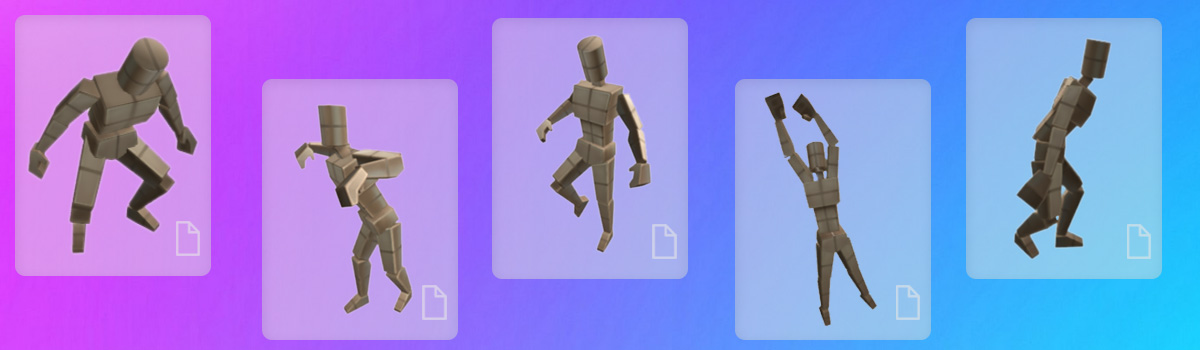
2. Q: What are keyframes and why are they important in Roblox animation?
A: Keyframes are absolutely the building blocks of any animation, and it’s super important to grasp them early on. Think of a keyframe as a snapshot or a critical pose in your animation. When you're animating, you define your character's position and rotation at specific points in time using these keyframes. The Roblox Animation Editor then automatically fills in the gaps between these keyframes, a process called interpolation, to create smooth transitions. This means you don't have to draw every single tiny movement. Instead, you just set the critical poses, like the start of a jump and the peak of the jump, and the editor handles the in-between frames. This makes animation much more efficient and manageable. Without keyframes, you'd have to manually position your character for every single millisecond of motion, which would be an absolute nightmare. They’re what give your animation its structure and flow. Get comfortable setting and adjusting them, because they’re your best friends in the animation process! You'll be a keyframe master in no time!
3. Q: Can I animate anything, or are there limitations to Roblox character animation?
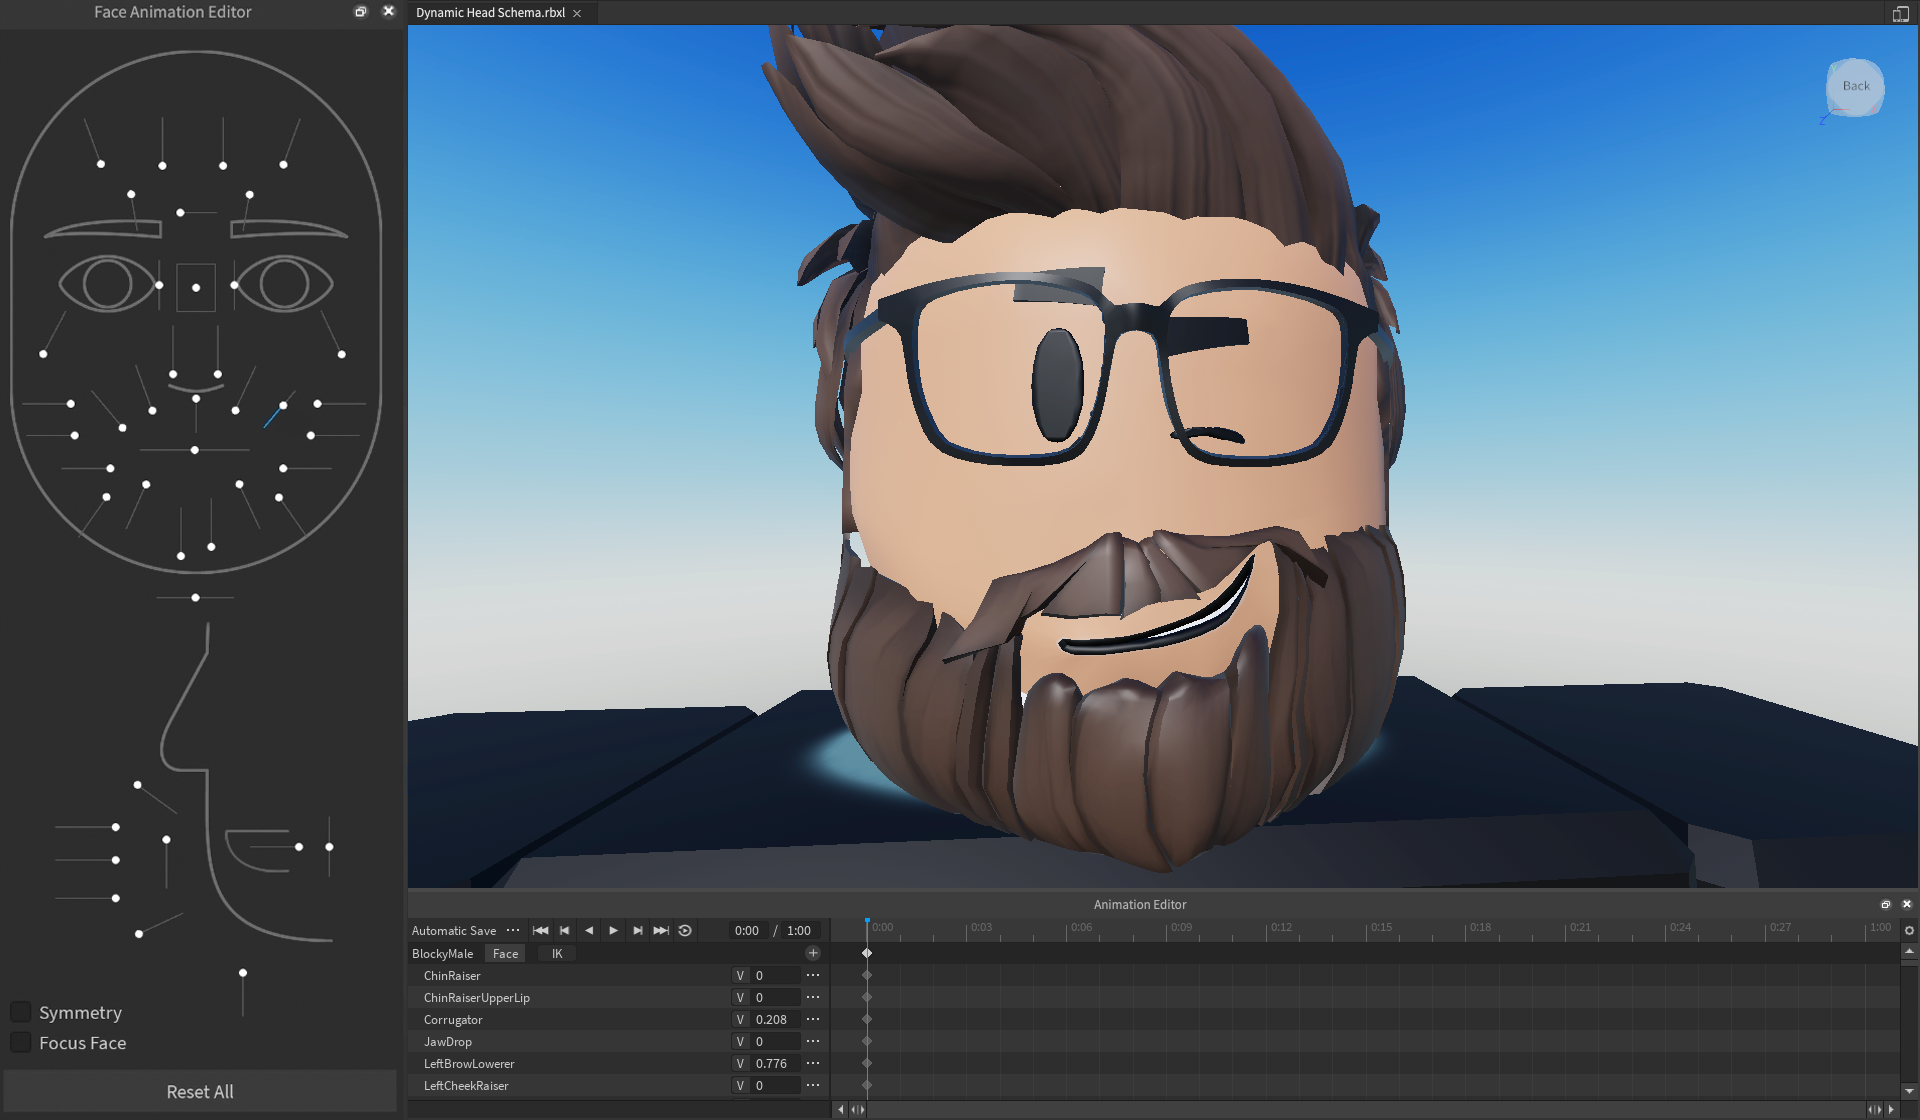
A: That's a great question, and I totally get why you'd ask, because creative freedom is key! While Roblox Studio offers incredible flexibility, there are indeed some practical limitations, mostly tied to the character rig itself. You can primarily animate the joints and body parts of an R6 or R15 character model. This means you can make arms swing, legs bend, and heads turn, but you can't, for example, independently animate individual fingers on a basic R15 hand since it's treated as one solid part. Complex facial expressions are also often achieved through texture swapping or morph targets rather than direct joint animation. Also, remember that animations are played server-side but often replicated to clients, so very high-frequency, unique animations on many characters can impact performance. However, for 99% of common character movements, dances, and actions, the Roblox animation system is incredibly robust. You can animate virtually any motion you can imagine for the standard avatar. Don’t let these small constraints stop you; focus on what you can do, and you’ll find the possibilities are endless!
4. Q: How do I test my animations to see if they look right?
A: Testing your animations is super crucial, and thankfully, Roblox Studio makes it really easy to preview your work! After you've set up some keyframes in the Animation Editor, you'll see a play button right there on the timeline, usually near the beginning. Just click that, and your character rig in the viewport will perform the animation you've created. This lets you immediately check the timing, flow, and overall look. If something feels off, you can quickly pause, adjust keyframes, and play it back again. You can also drag the timeline scrubber manually to scrub through the animation frame by frame, which is fantastic for pinpointing exact moments that might need tweaking. Beyond the editor, to see how it looks in a game context, you'll eventually need to put your animation into an Animation instance, upload it to Roblox (which gives it an AnimationId), and then use a script to play it on a character in a live playtest. But for the initial creation and refinement, that play button in the editor is your best friend. It’s all about iterative testing and tweaking! You'll refine your eye for timing with practice.
Intermediate / Practical & Production
5. Q: What's the best way to make my Roblox character animations look smooth and natural?
A: This one used to trip me up too, because choppy animations can really pull players out of the experience. The secret to smooth, natural-looking Roblox animations lies in a few key areas, and it's less about raw speed and more about finesse. First, focus on interpolation. When you set keyframes in the Animation Editor, Roblox automatically interpolates between them. You can control this by right-clicking keyframes and adjusting the Ease Style (e.g., Linear, Sine, Quad). Ease In and Ease Out are your best friends here, as they simulate acceleration and deceleration, making movements feel organic. Think about how a person starts walking slowly, speeds up, and then slows down before stopping; your animation should mimic that. Second, timing is absolutely crucial. Don't cram too many keyframes into a short time or stretch too few over a long period. Experiment with the spacing of your keyframes on the timeline to achieve the desired speed and rhythm. A good rule of thumb is to animate in arcs; natural movement rarely happens in straight lines. For instance, a hand reaching for something won't go directly from point A to point B but will follow a slight curve. Finally, overlapping action adds a lot of realism. If a character is jumping, their arms might still be moving downwards as their body starts to ascend, creating a sense of follow-through. It’s all about attention to detail. Try applying these principles to your next animation, and you'll definitely see an improvement!
6. Q: How do I create different animation priorities, and why does that matter?
A: Understanding animation priorities is a game-changer for complex character behavior, and it’s something many folks overlook initially. Essentially, an animation’s priority determines which animation plays when multiple animations are trying to run on the same character at the same time. If two animations have the same priority, they'll usually blend, which can look messy or cause unexpected results. By setting different priorities (Core, Idle, Movement, Action), you tell Roblox which animation should take precedence. For example, a
Mastering Roblox character animation, utilizing the Animation Editor, understanding R15 vs R6, creating custom emotes and movements, and enhancing game immersion.
35


How To Animate A Roblox Character In Blender Kinda YouTube . How To Animate Multiple Characters Roblox Animation Tutorial Part 4 . Roblox Character Animation Evolution RastaVideos Preview . How To Make Your Own Animation Roblox Studio At Darlene Whitely Blog . How To Animate Characters In Roblox Studio With ZERO Code YouTube


How To Animate In Roblox Studio YouTube . How To Animate Roblox Characters In Blender Quick Easy Tutorial . Roblox Studio How To Animate Roblox Character In Blender YouTube . How To Animate Your Roblox Studio Characters YouTube . How Tall Are Those R6 Roblox Characters Really


Animating Two Rigs In Roblox Studio A Simple Guide . How To Animate Your Roblox Character 100 WORKING GLITCH YouTube . Prepare For 2026 With Roblox Trends TikTok Img. Roblox Animation IDs March 2026 Roblox ID Roblox Animation Ids . Animations Blender To Roblox Made Easy


How To Animate Multiple Characters In Roblox Studio YouTube Hqdefault . Animations Blender To Roblox Made Easy . Anime Guardians Codes For February 2026 VG247 Roblox Layered Clothing . Tutorial How To Animate Roblox Characters YouTube . How To Animate In Roblox Studio Your Quick Guide Playbite How To Animate In Roblox Studio 1024x576


Roblox 2026 Logo Roblox YouTube Oar2 . Animating Two Rigs In Roblox Studio A Simple Guide . Mastering Roblox Animations A Step By Step Guide To Creating Engaging 2 690x400 . Animating Two Rigs In Roblox Studio A Simple Guide . Ithy Mastering The Art Of Character Animations In Roblox Creating Roblox Character Animation Types Guide 66fhhqfy 1


Animate In Roblox Roblox Creator Hub Hero . Ithy Mastering The Art Of Character Animations In Roblox Creating Roblox Character Animation Types Guide 66fhhqfy 2 . Ithy Mastering The Art Of Character Animations In Roblox Creating Roblox Character Animation Types Guide 66fhhqfy . Roblox The Movie 2026 V1 . What Will Roblox Look Like In 2026 Blog Graphics 26


ALL CHARACTER ANIMATIONS ROBLOX YouTube . Animar Cabezas Documentaci N Del Centro De Creaci N De Roblox Overview . How To Animate Characters And Play Them In Game Roblox Studio YouTube . How To Make Animations In Roblox Studio For Beginners A Quick User 282 Cover. Roblox 2026 New Logo REVEAL First Look At The Future Shorts YouTube Oar2